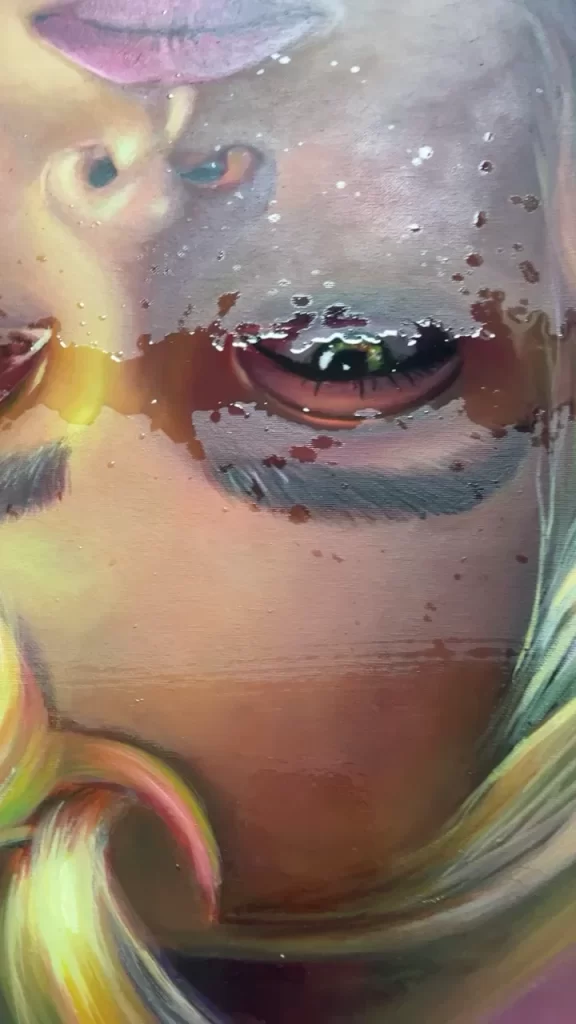
As an artist, there is nothing more frustrating than spending countless hours creating a masterpiece, only to have it ruined by the application of varnish. Varnish is a crucial element in painting that helps to protect and enhance the surface of the artwork.
However, when it is applied incorrectly, it can cause irreparable damage to the painting, leaving the artist feeling disheartened and disappointed. If the varnish has caused some damage to your painting, don’t worry, there are ways to fix it.
The first step is to remove the varnish layer using a solvent like turpentine or mineral spirits. Then assess the damage and determine if you need to touch up the paint. If so, try to match the color and texture of the surrounding areas as closely as possible. Once the touch-up is complete, apply a new layer of varnish. Your painting will look as good as new in no time!
In this article, we will explore the problem of varnish ruining paintings, why varnish is used in painting, and the critical importance of applying varnish correctly to avoid damaging the artwork.
We will also provide tips and guidelines for artists to help them ensure that their paintings are protected and preserved for years to come.
Signs of Varnish Ruined My Painting
If not applied properly, varnish can also have detrimental effects on the painting, ultimately ruining it.
There are several signs that can indicate when varnish has ruined a painting, and it’s important to be aware of them to prevent further damage.


NancyMP from WetCanvas shared her experience restoring this painting.
Yellowing
One common sign that varnish may be ruining a painting is yellowing. Over time, some varnishes can cause a yellowing effect on a painting’s surface.
This can result in a loss of color vibrancy and an overall dull appearance. This is especially true for older paintings that have been varnished with traditional varnishes.
The cause of yellowing is the reaction between the varnish and light, which causes the varnish to darken over time. This process is accelerated by exposure to heat and humidity.
Cloudiness or Hazing
Another sign that varnish may be ruining a painting is cloudiness or hazing. This can be caused by over-application, poor quality varnish, or applying the varnish in humid conditions.
When the varnish is applied too thickly or in humid conditions, it can create a cloudy or hazy effect on the painting’s surface, which can be difficult to remove. This effect can also be caused by using a low-quality varnish that contains impurities.
Cracking or Flaking
Cracking or flaking is another sign that varnish may have ruined a painting. If the varnish has cracked or formed blisters, it may indicate that it has not adhered properly to the painting’s surface.
This can be caused by applying the varnish too thickly, applying it too soon after the paint has dried, or not allowing each layer to dry completely before applying the next.
In some cases, the cracking or flaking may be the result of the varnish reacting with the paint underneath, which can cause it to lift off the surface.
Changes in Color
Changes in color are another indicator that varnish may be ruining a painting. If you notice a change in the colors of your painting, such as fading or darkening, it may be due to the varnish.
Some varnishes can alter the colors of a painting over time, especially if they are exposed to light and heat. This can result in a loss of contrast and vibrancy, making the painting appear dull and lifeless.
Streaks or Unevenness
Finally, streaks or unevenness in the varnish application can also indicate that the painting has been ruined. If the varnish has been applied unevenly or in streaks, it can create an unsightly appearance that detracts from the painting’s beauty.
This can be caused by improper application techniques or by using low-quality brushes or other tools.
How Varnish Can Ruin Your Painting?
Varnishing is an essential part of the painting process, but it can also be a tricky one. Applying varnish incorrectly can lead to a range of issues, from a cloudy appearance to cracking and flaking over time.
Here are some common mistakes artists make when applying varnish and how to avoid them.
Mistake #1: Applying Varnish Too Soon
One of the most common mistakes artists make when applying varnish is not waiting long enough for the paint to dry. Applying varnish too soon can cause the paint to mix with the varnish, creating a milky or cloudy appearance.
To avoid this-
- Wait at least 24 hours after the paint has dried before applying varnish.
- If you’re unsure, test the surface by gently touching it with your finger.
- If it feels dry and smooth, it’s likely safe to apply varnish.
Mistake #2: Applying Too Much Varnish
Another common mistake is applying too much varnish. Thick layers of varnish can cause yellowing, cracking, or flaking over time.
To avoid this-
- Apply varnish in thin, even layers, and wait for each layer to dry before applying the next one.
- Using a high-quality brush can also help prevent streaks and bubbles in the varnish.
Mistake #3: Using the Wrong Brush
Using the wrong brush or not cleaning the brush properly can also lead to issues when applying varnish.
- Avoid using cheap or low-quality brushes, as they can leave bristles or streaks in the varnish.
- Clean your brush thoroughly before and after use, using warm water and mild soap or specialized brush cleaners.
Mistake #4: Not Considering Environmental Factors
Environmental factors, such as humidity and temperature, can also affect varnish application.
High humidity can cause the varnish to dry too slowly, leading to the accumulation of dust or other debris on the surface. Low humidity can cause the varnish to dry too quickly, leading to cracking or flaking.
To avoid these issues-
- Apply varnish in a well-ventilated area.
- Avoid applying varnish on days with extreme humidity or temperature.
How to Fix a Painting Ruined by Varnish: 7-Step Process Explained
Removing varnish from a painting can be a delicate process, and it’s important to take the necessary precautions to avoid damaging the paint underneath. Here are some steps to remove varnish from a painting without causing damage:
Step 1: Test the Varnish Remover
Before applying any varnish remover to the painting, test it on a small, inconspicuous area to make sure it won’t damage the paint. This will give you a good idea of how the remover will work and whether it’s safe to use.
Step 2: Apply the Varnish Remover
Apply the varnish remover with a soft brush, working in small sections. Be careful not to scrub too hard, as this can damage the paint.
Apply the remover in a thin, even layer, and let it sit for the recommended amount of time (usually 10-15 minutes) before wiping it away with a clean, damp cloth.
Step 3: Use Cotton Swabs
For areas that require more precision, use cotton swabs to apply the varnish remover. This will help you avoid getting the remover on areas of the painting that don’t need to be treated.
Step 4: Work in Small Sections
Work on one small area at a time, rather than trying to remove the varnish from the entire painting at once. This will allow you to focus on each area and avoid damaging the paint.
Step 5: Be Gentle
When wiping away the varnish remover, be gentle and use a soft, lint-free cloth. Avoid rubbing too hard, as this can damage the paint.
Step 6: Repeat as Needed
If the varnish is stubborn and doesn’t come off with the first application of varnish remover, repeat the process as needed until all the varnish has been removed.
Step 7: Rinse with Water
After all the varnish has been removed, rinse the painting with water to remove any remaining residue from the varnish remover. Be sure to use a soft cloth or sponge to avoid damaging the paint.
It’s important to note that removing varnish from a painting can be a delicate process, and it may be best to consult a professional art conservator if you have any doubts or concerns about your ability to safely remove the varnish.
3 Types of Varnish Used in Paintings: Short Guide on How to Remove Them Safely
Damar Varnish
Damar varnish is a popular varnish among artists due to its high-gloss finish and ability to enhance the vibrancy of colors. It is made from damar resin dissolved in a solvent such as turpentine.
Damar varnish is commonly used for oil paintings, but can also be used in acrylic paintings. To remove damar varnish from a painting-
- You can use a solvent such as mineral spirits or turpentine.
- Apply the solvent to a soft cloth and gently rub the varnish in circular motions.
- Be careful not to apply too much pressure, which can damage the underlying paint layers.
- Repeat the process until all the varnish has been removed.
Mastic Varnish
Mastic varnish is a traditional varnish made from the resin of the mastic tree. It has a warm, amber color and is often used to create an aged or antique effect on oil paintings.
Mastic varnish is not commonly used on modern paintings, but can still be found on older works of art. To remove mastic varnish-
- Use a solvent such as denatured alcohol or acetone.
- Apply the solvent to a soft cloth and gently rub the varnish in circular motions.
- Be careful not to apply too much pressure, which can damage the underlying paint layers.
- Repeat the process until all the varnish has been removed.
Spray Varnish
Spray varnish is a popular choice for artists who want a quick and easy way to apply a protective coating to their paintings.
It is available in a variety of finishes, from matte to high-gloss, and can be used on both oil and acrylic paintings. To remove spray varnish from a painting-
- Use a solvent such as an isopropyl alcohol or paint thinner.
- Apply the solvent to a soft cloth and gently rub the varnish in circular motions.
- Be careful not to apply too much pressure, which can damage the underlying paint layers.
- Repeat the process until all the varnish has been removed.
Preventing Varnish from Ruining Your Painting
Varnish is often used to protect and enhance the longevity of a painting, but it can also cause problems if applied incorrectly or if the painting is not properly prepared. Here are some tips for preventing varnish from ruining your painting:
Wait until the painting is fully dry
It’s important to wait until your painting is completely dry before applying varnish. This typically takes at least 6 months for oil paintings and 1-2 days for acrylic paintings. Applying varnish before the painting is dry can cause the varnish to crack or peel.
Prepare the painting surface
Make sure the surface of your painting is clean and free from dust and debris before applying varnish. Any foreign particles on the surface can become trapped under the varnish and cause a bumpy or uneven appearance.
Test the varnish
Always test the varnish on a small, inconspicuous area of the painting before applying it to the entire surface. This will help you determine if the varnish will cause any unwanted changes to the appearance of your painting.
Apply varnish in thin layers

This artist on Reddit has been painting for 12 years and this is her first time varnishing any artwork.

Apply varnish in thin, even layers using a soft-bristled brush. Avoid overworking the varnish or applying too much, as this can cause the varnish to pool or drip.
Use a removable varnish
Consider using a removable varnish if you are concerned about the long-term effects of varnish on your painting. Removable varnishes can be easily removed without damaging the underlying paint layer, making them a great option for conserving valuable artwork.
Store your painting properly
Once your painting is varnished, store it in a cool, dry place away from direct sunlight to prevent the varnish from yellowing or cracking over time.
FAQs
- Can varnish damage affect a painting’s value?
Yes, it can significantly impact the painting’s aesthetic appeal and historical significance, reducing its worth. Varnish can cause discoloration, crackling, and other forms of damage to the painting, making it less desirable to collectors and buyers.
- How much does it cost to have a painting professionally restored after being damaged by varnish?
The cost of restoration depends on the extent of the damage and the size of the painting. Generally, it can cost anywhere from hundreds to thousands of dollars to have a painting professionally restored.
- Can varnish damage be prevented with proper storage and care?
Yes, proper storage and care can help prevent varnish damage. Avoid exposing the painting to direct sunlight or extreme temperatures, and keep it in a controlled environment with stable humidity levels.
- What types of varnish are most likely to cause damage to a painting?
Synthetic varnishes, such as polyurethane, are more likely to cause damage to a painting than natural varnishes, such as damar. However, any type of varnish can cause damage if not applied properly or if left on the painting for too long.
- Can varnish damage occur on any type of painting, or is it more common on certain types of artwork?
Varnish damage can occur on any type of painting, regardless of the medium or style. However, it is more common in older paintings that have been exposed to varnish over a long period of time.
Conclusion
In conclusion, varnish ruining my painting is a common problem that many artists face. However, by following the tips and techniques discussed in this article, you can prevent varnish from ruining your masterpiece.
From choosing the right varnish to applying it correctly, and maintaining your painting regularly, these tips can help you preserve your artwork for many years to come.
In the end, varnish can be a valuable tool in preserving and enhancing your artwork. By taking the time to learn about the different types of varnish, how to apply it correctly, and how to maintain it, you can ensure that your artwork remains vibrant and beautiful for years to come.
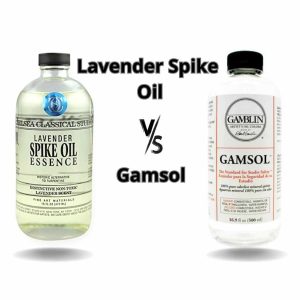
Understanding what went wrong with the varnish can help prevent future mistakes. For a better grasp of painting mediums, check out the comparison of Gamsol vs Linseed Oil.


